Why Isn’t My Yeast Foaming?-Troubleshooting Yeast Foaming Guide
The enigma of non-foaming yeast is a perplexing scenario encountered by bakers at various stages.
The absence of that eagerly anticipated froth can be frustrating, but understanding the underlying causes is key to rectifying the issue. Whether you’re a seasoned baker or a novice, this phenomenon can happen to anyone.
From incorrect water temperatures to expired yeast, a multitude of factors can contribute to this setback. Unraveling these mysteries and learning how to troubleshoot non-foaming yeast is a crucial skill in the world of baking.
In this guide, we’ll dissect the common reasons behind this issue and equip you with practical solutions for successful yeast activation.
What Is Yeast?
Yeast is a single-celled fungus belonging to the Saccharomyces cerevisiae species. It plays a pivotal role in baking, brewing, and fermentation processes.
These microorganisms metabolize sugars, converting them into carbon dioxide and alcohol through a process known as fermentation.
In baking, the released carbon dioxide creates the characteristic rise and texture in bread and other baked goods. Yeast is also crucial in the production of alcoholic beverages like beer and wine.
Beyond its culinary applications, yeast has substantial significance in biotechnology and scientific research, serving as a model organism for studying cellular processes due to its genetic similarity to higher organisms.
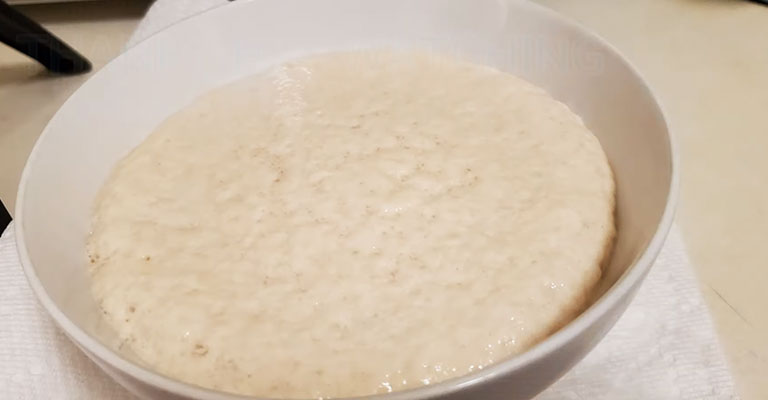
Why Isn’t My Yeast Foaming?
When your yeast isn’t foaming, it could be due to several reasons.
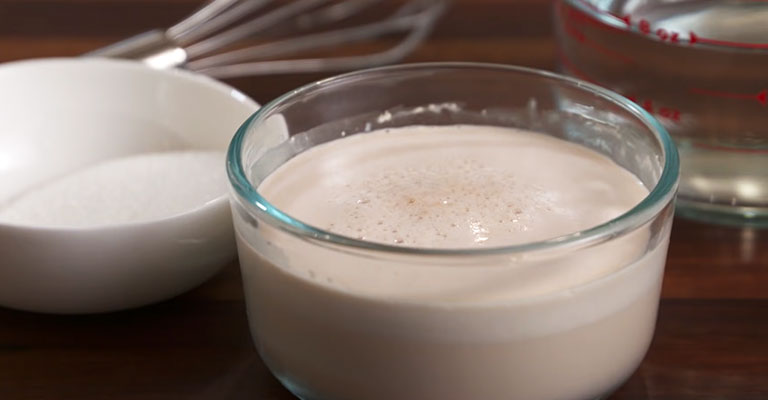
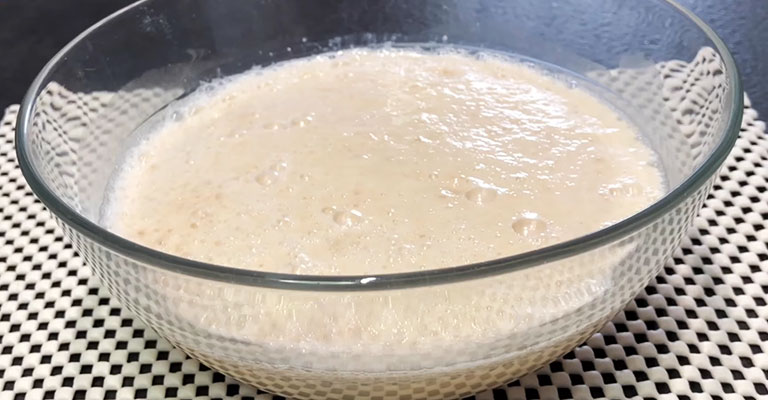
Achieving a good foam is crucial for proofing yeast, as it indicates that the yeast is active and will produce the desired rise in your dough.
Here are some common reasons why your yeast might not be foaming:
Expired or Inactive Yeast
Yeast is a living organism, and like all living things, it has a lifespan. When it reaches its expiration date, its viability diminishes.
Even if it’s not expired, yeast that’s been stored for too long may have lost its potency. Always check the date on the packaging before use.
Improper Storage
Yeast is sensitive to its environment. Storing it in a cool, dry place is crucial.
Exposure to heat, moisture, or air can drastically reduce its effectiveness. A tightly sealed container kept away from direct sunlight is ideal.
Water Temperature
The temperature of the water plays a pivotal role in yeast activation. Too hot, and it can kill the yeast. Too cold, and it might not activate properly.
Aim for around 100°F (37°C) for most yeast varieties. This ensures a cozy environment for the yeast to wake up and get to work.
Water Quality
Not all water is created equal when it comes to yeast activation. Chlorinated or heavily treated water can inhibit yeast activity.
When your tap water is heavily treated, consider using filtered or bottled water. This small change can make a significant difference.
Sugar Content
Yeast requires sugar to feed on. If there isn’t enough sugar in your mixture, the yeast won’t have the necessary nutrients to create the desired foam.
Ensure that your recipe includes an adequate amount of sugar for the yeast to thrive.
Wrong Type of Yeast
Different types of yeast have distinct activation requirements. For instance, active dry yeast requires rehydration in warm water, while instant yeast can be added directly to the dry ingredients. Make sure you’re using the correct type of yeast specified in your recipe.
Inactivity Period
Yeast can be a bit sluggish, especially in the initial stages of activation. If you haven’t seen any foam after 10-15 minutes, don’t lose hope. Patience is key. Sometimes, it just needs a bit more time to wake up and start working its magic.
Chemical Interference
Certain substances can hinder yeast activity. High acidity or excessive salt, for example, can disrupt the delicate balance needed for optimal yeast function.
Ensure that your recipe’s ingredients are balanced and do not overwhelm the yeast’s capabilities.
Environmental Factors
Yeast can be influenced by its surroundings. Extremely low or high humidity levels can impact its activity.
In very dry environments, you might need to adjust the water content, while in very humid conditions, less water might be necessary.
Adapting to your specific environment can make a significant difference in yeast performance.
Dough Inhibition
When you’ve already mixed the yeast with other ingredients like salt or sugar before adding water, it could inhibit the foaming process. The yeast needs direct contact with water to start its activation process effectively.
Overuse of Yeast Inhibitors
Recipes that call for long fermentation times might include ingredients like honey or molasses, which, in large amounts, can slow down yeast activity. Be mindful of the quantities and their potential impact on yeast performance.
Weak Flour
The quality of your flour matters. If your flour lacks sufficient gluten or protein content, it may struggle to hold the structure created by the yeast’s fermentation. Opt for high-quality flour with the right protein content for the best results.
Common Mistakes in Yeast Activation
Activating yeast is a crucial step in many baking recipes.
Here are some common mistakes to avoid when activating yeast:
Using Water That’s Too Hot or Too Cold
Yeast is quite particular about temperature. Water that’s too hot can be detrimental, as it can kill the yeast cells.
Conversely, water that’s too cold hinders the activation process. The ideal temperature is around 100°F (37°C), providing a warm and inviting environment for the yeast to come to life.
Neglecting to Check Expiration Dates
It’s easy to overlook the expiration date on a packet of yeast, but doing so can lead to disappointment.
Using expired yeast, even if it’s just slightly past its prime, can result in a lackluster performance. Always check the date before you start.
Storing Yeast Improperly
Yeast thrives in a cool, dry environment. Storing it in a place that’s too warm, damp, or exposed to air can drastically reduce its effectiveness.
An airtight container kept away from direct sunlight is the best way to maintain yeast’s potency.
Using Heavily Treated or Chlorinated Water
The quality of water used to activate yeast is crucial. Chlorinated or heavily treated water can have adverse effects on yeast activity.
When your tap water is heavily treated, consider using filtered or bottled water to give your yeast the best chance of success.
Not Adding Enough Sugar
Yeast needs sugar to kickstart its metabolic process. If your mixture lacks sufficient sugar, the yeast won’t have the necessary nutrients to activate and produce foam. Be sure to include the correct amount of sugar as specified in your recipe.
Using the Wrong Type of Yeast
Different types of yeast have specific activation requirements. It’s imperative to use the type of yeast indicated in your recipe.
For instance, active dry yeast needs rehydration in warm water, while instant yeast can be added directly to dry ingredients.
Impatience with the Activation Process
Yeast doesn’t always spring into action immediately. It can take a bit of time, especially in the initial stages.
Allow at least 10-15 minutes for the foam to develop. Rushing this process can lead to disappointing results.
High Acidity or Excessive Salt
Certain ingredients, like those with high acidity or excessive salt, can be detrimental to yeast activity.
Ensuring that your recipe’s ingredients are balanced and not overpowering the yeast is essential for successful activation.
Ignoring Environmental Factors
Environmental conditions play a role in yeast activation. Extremely low or high humidity levels can impact its performance.
Adjusting the water content as needed for your specific environment can make a significant difference.
Adding Yeast to Dry Ingredients Before Water
Yeast requires direct contact with water to activate effectively.
When you add it to dry ingredients like salt or sugar before adding water, you may inhibit the foaming process. Ensure the yeast is hydrated properly for optimal results.
Overuse of Yeast Inhibitors
Recipes that call for long fermentation times might include ingredients like honey or molasses.
However, in excessive amounts, these can slow down yeast activity. Be mindful of quantities to achieve the desired rise.
Using Weak Flour
The quality of your flour matters. If it lacks sufficient gluten or protein content, it may struggle to hold the structure created by yeast fermentation.
Opt for high-quality flour to support the yeast’s efforts in creating a well-risen dough.
Troubleshooting Non-Foaming Yeast
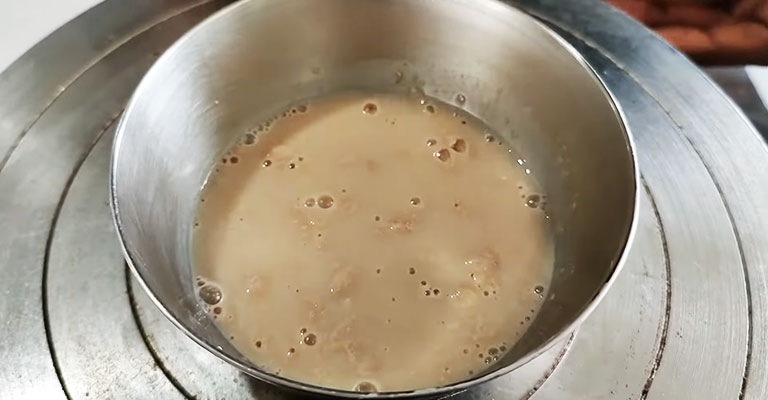
When yeast fails to foam during activation, it’s a sign that something in the process isn’t quite right.
Here are some troubleshooting steps to help you figure out what might be causing the issue:
Expired or Inactive Yeast
Yeast has a shelf life, and if it’s expired or too old, it may not be viable anymore.
Always check the expiration date on the package before use. Consider obtaining fresh yeast for optimal results.
Improper Storage
Yeast should be stored in a cool, dry place. Exposure to heat, moisture, or air can significantly reduce its viability.
Transfer any leftover yeast to an airtight container and store it in a cool, dark spot to preserve its potency.
Water Temperature
Yeast is sensitive to temperature. If the water you’re using is too hot, it can kill the yeast. Conversely, if it’s too cold, it might not activate properly.
The ideal temperature for most yeast is around 100°F (37°C). Use a thermometer to ensure the water is within this range.
Water Quality
Chlorinated or heavily treated water can inhibit yeast activity. Using filtered or bottled water can sometimes make a difference. If your tap water is heavily treated, consider this adjustment to support yeast activation.
Sugar Content
Yeast needs some form of sugar to feed on. If there isn’t enough sugar in your mixture, the yeast won’t produce the expected foam. Verify that your recipe includes an adequate amount of sugar for the yeast to thrive.
Wrong Type of Yeast
Ensure you’re using the correct type for your recipe. Different types of yeast (active dry, instant, fresh) have varying activation requirements. Double-check the recipe instructions to confirm you have the right kind.
Inactivity Period
Yeast can take a bit of time to activate. If you haven’t seen any foam after 10-15 minutes, there might be an issue. Be patient and allow extra time for the yeast to become active.
Chemical Interference
Certain substances, like high acidity or excessive salt, can hinder yeast activity.
Make sure your recipe’s ingredients are balanced. Adjusting the proportions can help ensure the yeast functions optimally.
Environmental Factors
Extremely low or high humidity levels can affect yeast activity. Very dry environments may require more water, while very humid ones may require less. Adapt to your specific environment to support yeast performance.
Dough Inhibition
When you’ve already mixed the yeast with other ingredients (e.g., salt or sugar) before adding water, it could inhibit the foaming process. Ensure that the yeast comes into direct contact with water for effective activation.
Overuse of Yeast Inhibitors
Some recipes that require long fermentation times might use ingredients like honey or molasses that, in large amounts, can slow down yeast activity. Be mindful of the quantities and their potential impact on yeast performance.
Weak Flour
When your flour lacks sufficient gluten or protein content, it may struggle to hold the structure created by the yeast’s fermentation. Opt for high-quality flour with the right protein content for the best results.
Preventing Future Issues
Preventing future issues with yeast activation and foaming is essential for successful baking.
Here are some steps you can take to ensure your yeast performs consistently:
Buy Fresh Yeast
Always check the expiration date on the yeast package and purchase fresh yeast. Using expired or old yeast significantly reduces the chances of successful activation.
Proper Storage
Store yeast in a cool, dry place in an airtight container. This helps maintain its viability and extends its shelf life.
Use the Right Water
Use water that’s at the correct temperature (around 100°F or 37°C) and is free from heavy chlorine or other chemical treatments. Filtered or bottled water is a good option if your tap water isn’t suitable.
Balanced Ingredients
Pay attention to the ingredients in your recipes. Ensure they are balanced and not overly acidic or salty, which can hinder yeast activity. Follow the recipe closely.
Select the Right Yeast Type
Use the yeast type specified in your recipe instructions. Different types (active dry, instant, fresh) require specific activation methods, so choosing the right one is crucial.
Wait for the Foam
Be patient during the yeast activation process. Allow enough time for the foam to develop. This may take 10-15 minutes, depending on the recipe and environmental factors.
Adapt to Environmental Factors
Be aware of environmental conditions, especially humidity levels. Adjust the water content as needed for your specific environment to ensure optimal yeast performance.
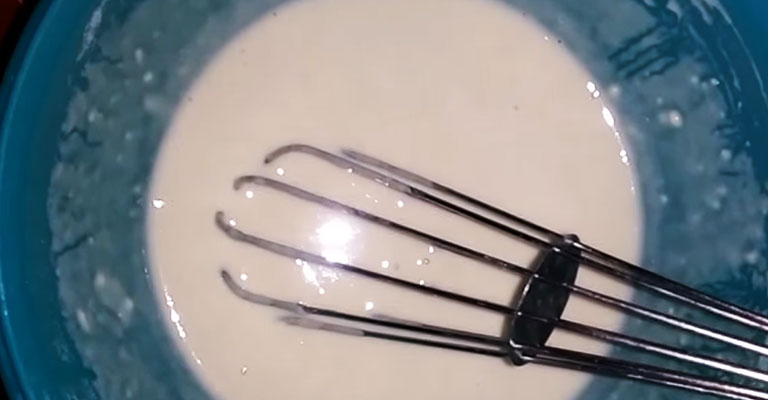
Dissolve Yeast Properly
Add yeast to water and give it a gentle stir to ensure it’s fully dissolved before adding it to dry ingredients. This helps prevent clumping or inhibition.
Limit Yeast Inhibitors
When using ingredients like honey or molasses, be mindful of the quantities, especially in recipes with long fermentation times. Large amounts of these ingredients can slow down yeast activity.
Quality Flour
Use high-quality flour with the right protein content for the type of bread or baked goods you’re making. Quality flour provides a strong structure for yeast fermentation.
Regularly Clean Baking Equipment
Ensure your baking utensils and equipment are clean and free from residual ingredients or contaminants. This helps maintain a consistent baking environment.
Document and Learn
Keep a baking journal to record your experiences. Note the successful recipes and what worked well, as well as any failures and the issues you encountered.
This helps you learn from your mistakes and improve your baking skills over time.
Tips for Successful Yeast Activation
Yeast activation is a critical step in baking that sets the foundation for a well-risen, flavorful result.
Whether you’re a seasoned baker or just starting out, these tips can help ensure your yeast performs at its best:
Freshness is Key
Start with fresh yeast. Always check the expiration date on the package and opt for the freshest batch available. Using expired yeast can lead to lackluster results.
Proper Storage Matters
Keep yeast in an airtight container in a cool, dry place. Exposure to heat, moisture, or air can diminish its potency. This simple step can extend its shelf life and effectiveness.
Mind the Water Temperature
Yeast is sensitive to temperature. Use water that’s around 100°F (37°C). Too hot can kill the yeast, and too cold may not activate it properly. A thermometer is a baker’s best friend for this.
Choose Water Wisely
When your tap water is heavily chlorinated or treated, consider using filtered or bottled water. High chemical content in water can inhibit yeast activity.
Balance Your Ingredients
Ensure the recipe’s ingredients are balanced. Avoid excessive acidity or salt, as they can impede yeast function. Follow the recipe instructions closely.
Select the Right Yeast Type
Different recipes call for different types of yeast (active dry, instant, fresh). Use the type specified in your recipe for optimal results.
Practice Patience
Allow sufficient time for the yeast to activate. Be patient and give it at least 10-15 minutes to develop a good foam. Rushing this step can lead to disappointing results.
Consider Environmental Factors
Take note of the humidity levels in your environment.
Adjust water content as needed to accommodate for extremely dry or humid conditions. This helps create an ideal environment for yeast activation.
Dissolve Yeast Properly
Add yeast to water and gently stir to ensure it’s fully dissolved before incorporating it into your dry ingredients. This prevents clumping and promotes even distribution.
Moderate Yeast Inhibitors
When using ingredients like honey or molasses, be cautious with quantities, especially in recipes with extended fermentation times. Large amounts of these ingredients can slow down yeast activity.
Invest in Quality Flour
The type and quality of flour matter. Choose flour with the right protein content for your specific recipe. Quality flour provides the necessary structure for successful yeast fermentation.
Keep Equipment Clean
Regularly clean your baking utensils and equipment to ensure they’re free from residual ingredients or contaminants. A clean environment supports consistent and successful yeast activation.
FAQs
Why isn’t my yeast foaming after adding it to warm water?
The water might be too hot or too cold. Yeast thrives at around 100°F (37°C), so double-check the temperature.
I’m using fresh yeast, but it’s still not foaming. What’s wrong?
Even fresh yeast has a limited shelf life. Check the expiration date to ensure it’s still active.
I’ve followed the recipe exactly, but there’s still no foam. What should I do?
Double-check that your water isn’t heavily chlorinated. If it is, try using filtered or bottled water instead.
Could using the wrong type of yeast be why it’s not foaming?
Yes, different yeast types require specific activation methods. Make sure you’re using the type specified in your recipe.
I’ve waited for over 15 minutes, and there’s still no foam. What’s the next step?
It might be best to start over with fresh yeast and ensure your water temperature is within the correct range.
To Recap
In the world of baking, yeast foaming is a pivotal moment that signifies successful fermentation and a delicious outcome.
When your yeast fails to foam, it can be attributed to various factors, including improper water temperature, expired or poorly stored yeast, water quality issues, and even the wrong yeast type.
Understanding these potential pitfalls and taking corrective measures can significantly improve your baking experience.
Remember, the art of working with yeast is a balance of precision and patience, and with practice and attention to detail, you can troubleshoot and prevent non-foaming yeast issues, ultimately ensuring your bread, rolls, or pastries rise beautifully and taste as delightful as ever.