Why Is My Sourdough So Sticky?-Causes, Solutions, and Expert Tips
Sourdough bread, with its rustic charm and complex flavors, has gained a devoted following among home bakers.
Yet, amid the excitement of nurturing a sourdough starter and watching it rise, one common issue often arises sticky dough. This challenge can be both perplexing and frustrating, leaving bakers wondering why their dough refuses to cooperate.
Understanding the reasons behind sticky sourdough is essential for achieving that perfect loaf. Several factors contribute to this stickiness, from the hydration level and flour type to mixing techniques and environmental factors.
This exploration seeks to shed light on the causes of sticky sourdough and provide solutions for a more successful and rewarding sourdough baking experience.

What Is Sourdough?
Sourdough is a traditional method of bread-making that predates commercial yeast.
It relies on wild yeast and lactic acid bacteria naturally present in flour and the environment. To create sourdough, a mixture of flour and water is fermented over several days, allowing these microorganisms to thrive.
This fermentation imparts a distinctive tangy flavor and leavening properties to the dough. Sourdough is characterized by its long fermentation process, which enhances texture, flavor, and digestibility.
It’s cherished for its crusty exterior, open crumb structure, and rich, complex taste. Sourdough has gained popularity for its artisanal qualities and is celebrated in various culinary cultures worldwide.
Why Is My Sourdough So Sticky?
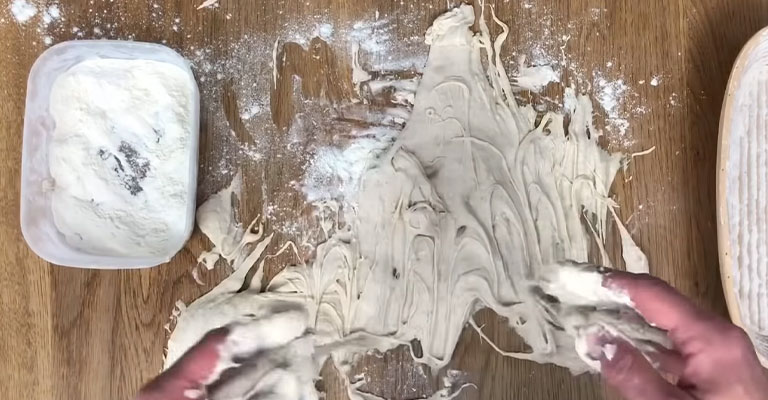
When your sourdough is turning out sticky, it can be quite frustrating, but don’t worry – it’s a common issue in sourdough baking. Several factors can contribute to a sticky sourdough dough.
Let’s explore the reasons behind this stickiness:
High Hydration Level
High-hydration doughs, typically over 75% hydration, are known for their stickiness. They can be more challenging to handle, especially for beginners.
To make them more manageable, consider gradually increasing the hydration level as you gain confidence in handling wetter doughs.
Flour Type
Whole grain flours and certain specialty flours like rye or spelled tend to absorb more water, resulting in a stickier dough.
When you’re working with these flours, be prepared for a wetter consistency and adjust your hydration levels accordingly.
Undermixing
Adequate mixing and kneading are crucial for developing the gluten network. If your dough is undermixed, it won’t achieve the necessary structure to hold its shape.
Spend a bit more time on kneading and consider techniques like the stretch and fold method to strengthen the dough.
Overhydration
Precise measurement of water is essential. Even a slight overpour can lead to a sticky dough.
Pay attention to hydration percentages in your recipe and adjust water quantities accordingly.
Starter Activity
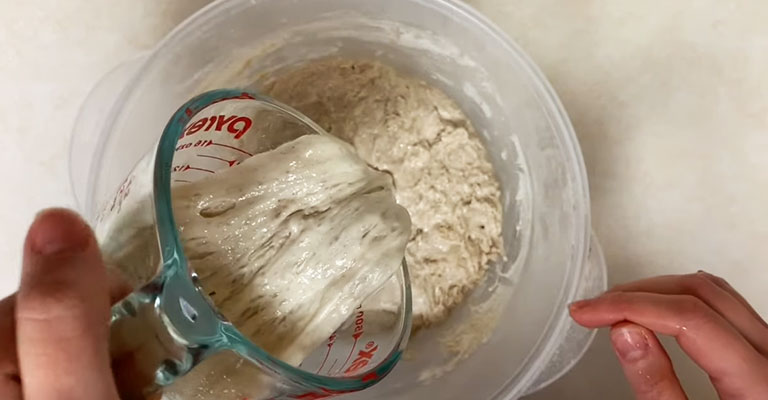
The vitality of your sourdough starter significantly influences the dough’s stickiness.
When your starter is particularly vigorous, it can contribute to a stickier dough. You may want to use a less active starter or adjust your fermentation times to compensate.
Temperature and Humidity
Environmental conditions can greatly affect dough consistency. In humid conditions, your dough may absorb more moisture, resulting in stickiness.
Likewise, warmer temperatures can speed up fermentation, potentially leading to a stickier dough. Consider adjusting your recipe or techniques based on the prevailing conditions.
Autolyse
Taking time for an autolyse allows the flour to fully hydrate, improving the dough’s texture and reducing stickiness.
Aim for at least 30 minutes, but longer autolyses, up to a few hours, can further enhance the dough’s elasticity.
Salt
Incorporating salt directly into your sourdough starter can slow down fermentation and potentially lead to a stickier dough.
Instead, try adding salt after the autolyse or initial mixing stage to ensure proper fermentation.
Overfermentation
Allowing your dough to ferment for too long can lead to over-fermentation.
This can cause the dough structure to break down, resulting in stickiness. Monitor your fermentation times closely, especially in warmer environments.
Inadequate Flour Incorporation
Ensure that you’ve thoroughly incorporated all the flour during the mixing process.
Sometimes, pockets of dry flour can remain, leading to inconsistent dough texture. Take your time and make sure everything is well combined.
Mixing and Kneading Techniques

Mixing and kneading are essential steps in bread and sourdough baking, as they help develop gluten and create structure in the dough.
Here are some techniques and tips for effective mixing and kneading:
Mixing Techniques:
Gather Your Ingredients
Ensure that all your ingredients are at the ready. Have your flour, water, starter, and salt measured out and prepared. This organized approach sets the stage for a smooth mixing process.
Combine Flour and Water
When you initially combine the flour and water, it’s the beginning of the gluten development process.
Allow this mixture to rest during the autolyse period, typically ranging from 30 minutes to a few hours. Autolyse gives the flour a chance to absorb the water fully, resulting in improved dough elasticity.
Incorporate Starter and Salt
After the autolyse, introduce your sourdough starter and salt. Ensure these components are evenly distributed throughout the dough.
You can use your hands or a mixer depending on your preference, but be careful not to overmix.
Hand Mixing
When you’re hand-mixing, use a technique like the “pinch and fold.”
Reach into the dough, pinch a portion, stretch it gently, and fold it over the top. Rotate the bowl as you go, maintaining an even distribution of effort.
Using a Mixer
For stand mixer users, attach the dough hook and operate on a low to medium speed.
Watch for the dough to come together and start pulling away from the sides of the bowl. Avoid the temptation to overmix, as this can lead to a tough final product.
Kneading Techniques:
Floured Surface
Lightly flour your work surface to prevent sticking. This ensures that the dough maintains its desired consistency and doesn’t adhere excessively to your hands or the counter.
Knead Gently at First
Begin with gentle folds, using the heel of your hand to push the dough away.
Rotate it 90 degrees and fold again. This motion helps integrate air and align gluten strands, contributing to a well-structured dough.
Fold and Rotate
Continue with a rhythmic pattern of folding and rotating. You’ll feel the dough becoming smoother and less sticky as you work. Knead for around 10-15 minutes, or until the dough exhibits elasticity and springs back when pressed.
Dough Window Test
To check for gluten development, perform the “windowpane” test. Take a small piece of dough and gently stretch it between your fingers.
When you can create a thin, translucent membrane without it tearing, your dough is sufficiently kneaded.
Rest Periods
When the dough starts to resist further kneading, let it rest for a few minutes. This relaxation period allows the gluten to ease, making it more pliable when you resume kneading.
Mixer Kneading
When you’re using a stand mixer, continue kneading with the dough hook for about 5-7 minutes. Monitor the dough’s texture and consistency. It should pass the windowpane test.
Fermentation
Following kneading, allow the dough to ferment according to your recipe’s instructions. This phase is pivotal for flavor development and for the dough to rise properly.
Adjustments and Solutions in Sourdough Baking

Sourdough baking is both an art and a science, and sometimes, minor tweaks can make a significant difference in your final product.
Here are some adjustments and solutions to address common challenges:
Sticky Dough
- Adjustment: Reduce hydration level by using slightly less water.
- Solution: Gradually add flour until the dough reaches the desired consistency. Consider using bread flour for a less sticky result.
Dense Crumb
- Adjustment: Increase fermentation time or temperature slightly.
- Solution: Allow the dough to ferment longer, ensuring it doubles in size before shaping. Ensure your starter is active and healthy.
Flat Loaf
- Adjustment: Increase dough strength through thorough mixing and kneading.
- Solution: Incorporate folds during bulk fermentation to strengthen the dough’s structure. Use a banneton or shaping basket for added support.
Overly Sour Flavor
- Adjustment: Shorten the fermentation period.
- Solution: Reduce the time the dough spends fermenting, especially during the final proofing stage. Consider adjusting the temperature to slow down fermentation.
Lack of Oven Spring
- Adjustment: Ensure proper shaping and tension during pre-shaping and final shaping.
- Solution: Shape the dough with enough tension to create surface tension. Score the loaf adequately for controlled expansion.
Uneven Crust Color
- Adjustment: Preheat your oven with a baking stone or Dutch oven.
- Solution: Use a baking stone or Dutch oven to create a more even baking environment. Rotate the loaf halfway through baking.
Excessive Sourdough Starter Activity
- Adjustment: Feed the starter with a higher ratio of flour to water.
- Solution: Adjust the feeding schedule to maintain a more balanced activity level. Consider storing your starter in a cooler environment.
Bland Flavor
- Adjustment: Lengthen fermentation time or incorporate additional whole grains for flavor complexity.
- Solution: Allow the dough to ferment for a longer period to develop a deeper flavor profile. Experiment with different flours or add ingredients like seeds or herbs.
Crust Too Thick or Too Thin
- Adjustment: Adjust oven temperature and steam levels.
- Solution: Increase the initial oven temperature and steam for a crisp crust. Reduce temperature for a lighter crust.
Sourness Overwhelms Other Flavors
- Adjustment: Use a milder starter or decrease the proportion of the starter in the recipe.
- Solution: Experiment with different types of starters or reduce the amount used to achieve a more balanced flavor.
Troubleshooting Common Sourdough Baking Mistakes
Toubleshooting common mistakes in sourdough baking is an essential skill for any baker.
Let’s go through some common issues and their solutions:
Sticky Dough
- Issue: The dough is excessively sticky and challenging to handle.
- Solution: Reduce hydration by using less water or adjust the flour-to-water ratio. Consider using bread flour for better structure.
Dense Crumb
- Issue: The interior of the bread is compact and lacks a light, airy texture.
- Solution: Increase fermentation time, ensuring the dough doubles in size during bulk fermentation. Check the vitality of your starter.
Flat Loaf
- Issue: The final loaf lacks volume and appears flat.
- Solution: Strengthen the dough through thorough mixing and kneading. Add folds during bulk fermentation to enhance structure.
Overly Sour Flavor
- Issue: The sourness of the bread is too pronounced.
- Solution: Shorten fermentation time, especially during final proofing. Adjust the temperature to slow down fermentation.
Lack of Oven Spring
- Issue: The bread does not rise well during baking.
- Solution: Ensure proper shaping and tension during pre-shaping and final shaping. Score the loaf adequately for controlled expansion.
Uneven Crust Color
- Issue: The crust is unevenly browned.
- Solution: Preheat your oven with a baking stone or Dutch oven. Rotate the loaf halfway through baking for even exposure.
Excessive Sourdough Starter Activity
- Issue: The starter is too active, leading to overly sour bread.
- Solution: Adjust the feeding ratio to favor more flour than water. Store your starter in a cooler environment to slow down activity.
Bland Flavor
- Issue: The bread lacks depth of flavor.
- Solution: Lengthen fermentation time or add additional whole grains for complexity. Experiment with different flours or incorporate ingredients like seeds or herbs.
Crust Too Thick or Too Thin
- Issue: The crust is not to your desired thickness.
- Solution: Adjust oven temperature and steam levels. A higher initial temperature and increased steam can result in a thicker crust.
Sourness Overwhelms Other Flavors
- Issue: The sourness dominates the overall flavor profile.
- Solution: Use a milder starter or reduce the proportion of the starter in the recipe. This will help balance the flavors.
Tips for Working with Sticky Sourdough
Working with sticky sourdough can be a bit challenging, but with the right techniques and a bit of patience, you can still achieve excellent results.
Here are some tips to help you handle sticky sourdough more effectively:
Flour Your Hands and Work Surface
Ensuring your hands and work surface are lightly dusted with flour creates a barrier between the dough and your skin. This prevents excessive sticking and makes handling the dough much more manageable.
Use a Bench Scraper
A bench scraper is akin to an extra pair of hands in sourdough handling. It’s invaluable for lifting and folding the dough, especially during stretch-and-fold sessions. With its sharp edge, it effortlessly separates the dough from surfaces.
Avoid Overmixing
Overmixing exacerbates stickiness. If you find your dough is on the wetter side, be mindful not to overwork it. Mix just until the ingredients are integrated, allowing the dough to maintain its desired texture.
Master the Stretch and Fold Technique
This technique is not only effective for gluten development but also for handling sticky dough.
As you gently stretch and fold the dough over itself, you’re strengthening its structure without causing excessive sticking.
Be Gentle
Treat the dough with care. Avoid aggressive handling, which could result in a denser crumb.
Gentle movements, even when shaping or transferring the dough, help maintain its integrity.
Use Wet Hands
While it might seem counterintuitive, wetting your hands with a bit of water can be an effective strategy for handling sticky dough. The moisture prevents the dough from adhering to your skin, allowing for smoother manipulation.
Refrigerate the Dough
When you find the dough is exceptionally sticky, a short stint in the refrigerator can be a game-changer. The cold temperature firms up the dough, making it much easier to work with.
Use a Dough Scraper for Shaping
When shaping the dough, a dough scraper is an invaluable tool. It aids in lifting and folding the edges, preventing sticking. This is especially crucial when dealing with high-hydration doughs.
Embrace the Stickiness
Recognize that some stickiness is inherent in sourdough baking, especially with higher hydration levels.
Rather than adding excessive flour, which can alter the texture and consistency of the final bread, embrace the unique characteristics of your dough.
Practice Patience
Sticky dough demands a bit more time and attention. Allow yourself the time needed to work through the process, ensuring each step is completed with care.
Consider Cold Bulk Fermentation
When your dough is particularly sticky, a cold bulk fermentation in the refrigerator can be a great aid.
This slows down the fermentation process, making the dough more manageable while still allowing for flavor development.
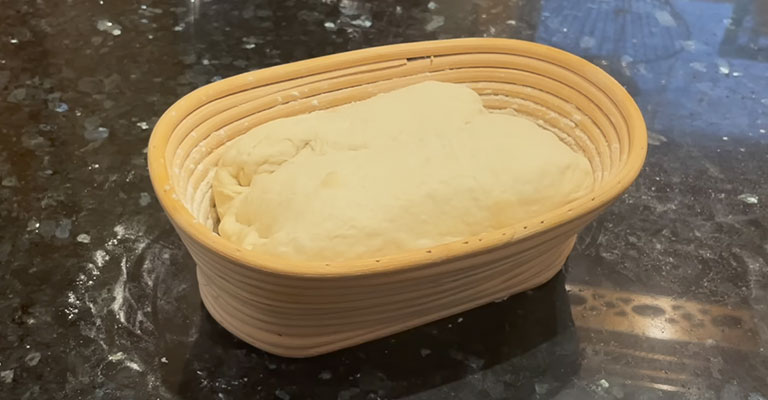
Use a Banneton or Proofing Basket
These baskets, when well-floured, provide support during the final rise and help maintain the dough’s shape. They also aid in preventing excessive sticking.
Experiment with Different Flours
Introducing various flours, such as rye or whole wheat, can alter the dough’s texture and handling properties. It can also add depth of flavor to your final bread.
FAQs
Why is my sourdough dough so sticky?
The sourdough dough can become sticky due to a high hydration level, where there is more water relative to flour in the recipe.
Can the type of flour I use make my sourdough sticky?
Yes, the type of flour can impact stickiness. Flours with lower protein content, like all-purpose or whole wheat flour, tend to absorb more water and can result in a stickier dough.
How can I reduce stickiness in my sourdough dough?
You can reduce stickiness by adjusting the hydration level, using less water, and working with a slightly firmer dough.
What role does mixing play in dough stickiness?
Proper mixing is essential for gluten development, which can reduce stickiness. Overmixing, on the other hand, can make the dough stickier.
Is sticky sourdough dough normal?
Yes, some level of stickiness is normal, especially with high-hydration doughs commonly used in sourdough baking.
To Recap
Encountering sticky sourdough is a common challenge in the world of artisan baking. This stickiness can be attributed to various factors, such as a high hydration level, the type of flour used, and even environmental conditions like humidity and temperature.
However, with the right adjustments and techniques, sticky dough need not deter your sourdough baking journey.
By fine-tuning hydration, using appropriate flours, and mastering gentle handling methods, you can transform a sticky challenge into an opportunity for delicious, artisanal bread.
Remember that practice, patience, and a willingness to experiment are key in mastering the art of working with sticky sourdough.